Download Mpc Cstudio Software for Mac
In this guide, we volition show you how to get up and running with the Akai Professional person MPC Studio for the first fourth dimension. Follow the sections below to become started.
Before y'all kickoff using the MPC Studio, you lot demand to annals the device on the Akai Professional website. By doing and then, you lot'll be able to admission all of the bundled software, including the MPC Studio DAW, a bundle of virtual instruments, vocal and furnishings plug-ins, and free MPC Beat Packs. Keep your Sweetwater invoice handy, as you'll need it during the registration process.
- Log in to your Akai account. If yous don't take 1, click Create Account, so fill up out the necessary information.
- On your account home folio, click REGISTER NEW PRODUCT , enter the serial number, which is located on the lesser of the unit, the back of the MPC Studio owner's manual, and the side of the box.
- Click Cheque Serial, fill out the required information, then click Annals YOUR PRODUCT.
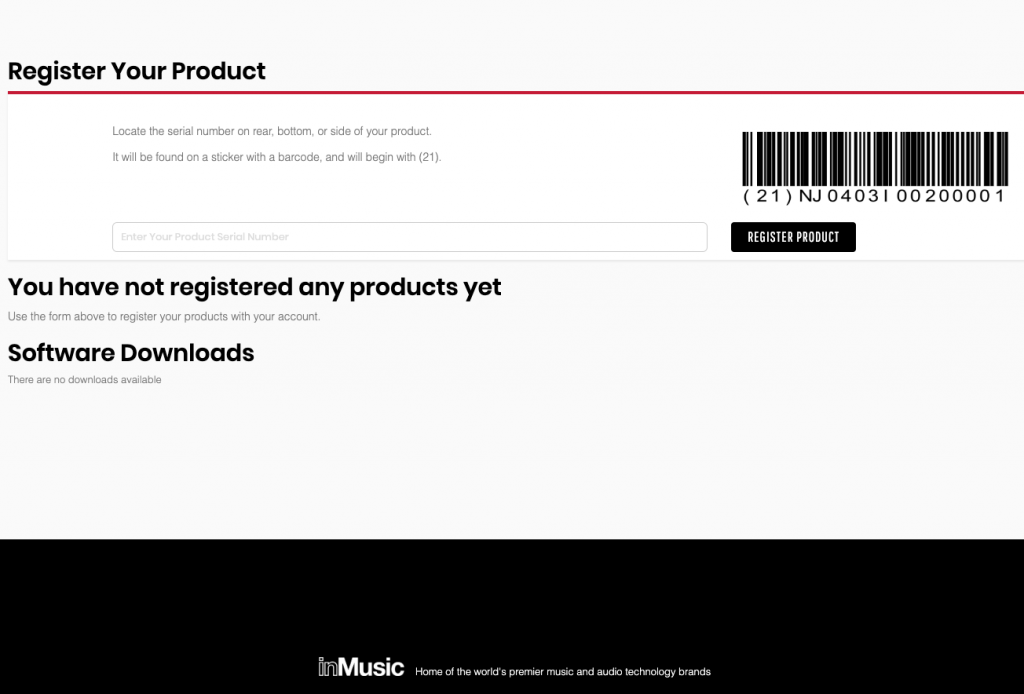
Click the image to register your MPC Studio
Download and install the software
In one case you've registered the MPC Studio, you lot'll be able to download and install the bundled software. Your software activation keys and installers are all located in the MPC Software Manager, which you lot tin download from your Akai account folio.
iLOK Account: If yous are registering any of the AIR Instrument virtual instruments, then you lot will demand to create a free iLok account during the activation process. Cheque out our AIR Software Activation Instructions for more information!
- Expand the MPC Studio two Installer, located in the Software Downloads section of your Akai business relationship page, and choose the installer for your OS.
- Navigate to your Downloads folder and launch the MPC Studio Software Manager.
- Follow the on-screen instructions.
- One time prompted, click I accept an iLok Account. If y'all don't have one yet, keep this tab open and head over to our iLok Setup Guide to learn how to create one.
- Install the driver and firmware by clicking their respective Install buttons.
- Install the MPC 2 software. When prompted, enter the activation code, which you can notice when yous click Get Activation Lawmaking.
Installing the additional synth content
When you first launch the MPC Studio DAW, you'll receive a notification about your costless additional synth software.
- Navigate to the top toolbar and click MPC, and then click Get Synth Content. This volition download the MPC Synth Content installer.
- Close MPC Studio, so run the Synth Content installer. One time complete, relaunch the MPC Studio DAW.
How to Set up Up Your MPC Studio Controller & Software
Setup and connections
Now that y'all've taken care of the registration and software installation process, let's testify y'all how to get set up and connected! Akai Professional person has made the hardware connection process straightforward. Simply utilize the included USB cable to connect information technology to your calculator, so use the 5-pin MIDI to TRRS adapters to connect MIDI devices.
CONNECT DIRECTLY TO YOUR Computer! The MPC Studio is autobus powered, which ways no external power supply is necessary. However, we strongly recommend connecting the MPC direct to your computer, as USB hubs (mainly passive ones) may not have enough power for a stable USB connection.
How to Navigate Your MPC Studio Controller
Recording a beat is very like shooting fish in a barrel using your MPC Studio in the MPC Studio DAW. Merely pick the instruments you lot want on each track, then start recording! One great affair is that you tin can overdub tracks. This is particularly useful for trap beats where the hi-hats take a more complex blueprint.
You tin load a drum kit (Plan), an musical instrument (Preset), templates that yous created on previously created songs (Project), factory Sequences, and lastly, Samples.
- Open the Media Browser to pull up any installed expansion libraries.
- Alternatively, yous can printing the B key on your keyboard to open the Media Browser.
- Select the expansion library of your choosing, and then load the instrument blazon (Program, Preset, Project, Sequence, Sample).
- Printing the Browse push button on your MPC Studio and apply the data wheel to coil through, preview, and select the kit/instrument/sample you lot desire to utilise.
- Once y'all've found something you like, printing the data cycle to load it onto a track, then press the Principal button to begin playing.
- If you'd like to load an additional musical instrument on the aforementioned track, follow the same procedure. Once loaded, press the Programme Select button and use the data cycle to switch between the instruments.
- Press the Rail Select push button and follow the steps above to insert an instrument on a new track.
You can easily supplant individual samples on an instrument. The process is straightforward, likewise!
- Click the Sample button in the MPC software, and then follow steps 1–3 as outlined in a higher place to scan the samples.
- Once you lot find the sample you want, press the pad y'all wish to assign information technology to, and so printing the information wheel to load it into memory.
How to Scan the MPC Studio Sounds & Pulsate Samples
Once y'all accept all of your instruments loaded into retention, it's time to create a beat out! One of the keen things nigh the MPC Studio is that everything is done right on the hardware, so there isn't a demand to stop a recording to select a new track or to re-record.
- If y'all haven't already, enter the main bill of fare by pressing the Main push.
- Hold down the Tap Tempo push button and employ the data wheel to choose the projection tempo.
- Printing the Record button to arm the runway, then press the Play push button to begin recording.
- Arm the track and press the Play Kickoff push to record along with a click rails.
- In one case the recorded sequence plays through one time, Overdub will automatically be enabled. Stop recording past pressing the Overdub push or the Cease push.
- To record on the next track, apply the data bike to switch tracks, and then follow the same procedure.
- If you want to erase a specific note/instrument design (eastward.g., a snare pulsate), then stop recording, brainstorm playback, then printing and concord both the Erase push and the pad the sample is assigned to.
How to Make a Beat on MPC Studio
Akai MPC Studio Academy
When you demand assistance, Sweetwater has the answers!
Our knowledge base of operations contains over 28,000 expertly written tech manufactures that will give you answers and help you get the most out of your gear. Our pro musicians and gear experts update content daily to go on you informed and on your way. All-time of all, information technology'southward totally FREE, and information technology'southward just some other reason that yous go more than at Sweetwater.com.

Download Mpc Cstudio Software for Mac
Posted by: johnnystearle59.blogspot.com
Post a Comment